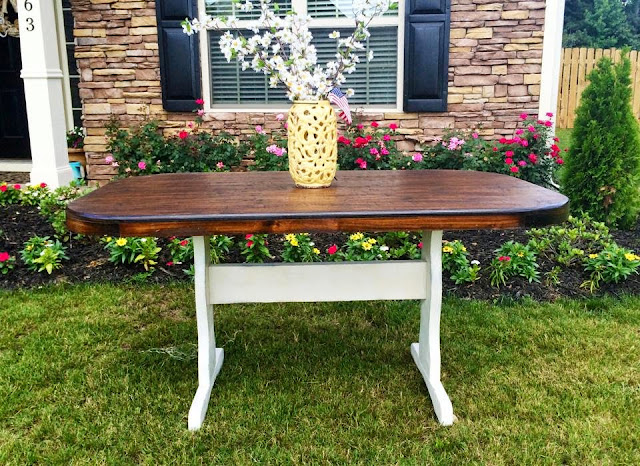
The most expensive thing we have bought in our house were our dining room chairs for $75 each and even that price tag has made me full of regret when I see awesome chairs at Goodwill for $8 each. People.... BUY USED! It will change your life. And when you run out of pieces to put in your house, you can start selling them. I have been amazed at how quickly this look sells and the profit you can make right out of your own garage. And the best part is... it's so easy. Everyone thinks I have some kind of talent when really, the opposite is true. I am not great at painting... I can't stay inside the lines for the life of me and am not a very patient person. So all that to say... here is a small tutorial on how I finish furniture. I am positive you can search pinterest and find a much more detailed, complex way to do it. But I love being able to start and finish a project within a matter of hours. So before I get started on the tutorial I will share with you some of my favorite pieces and the price I got them for!
This little rustic beauty of a table was only $20.
$12 Goodwill
And quite possibly my favorite piece ever that has found a home in my kitchen was only $35 at Goodwill.
What you'll need:
1. A paint brush
2. An old piece of furniture to paint
3. Chalk paint (I like Annie Sloan)- you can make your own chalk paint if you want to but I find it much easier to just buy the pre-made chalk paint. It works better anyways.
4. A clean rag
5. A finishing coat (I use polycrylic because it's easy)
Step One: Find your piece. I found this little wooden dresser at Goodwill the other day and with a price tag of $25 I said I'll take it!
Step 2: Take your clean rag and some water and clean it off. This is the part you would go ahead and take all the knobs off too if there are any.
Step 3: Paint 2 coats of the chalk paint onto the furniture. It's that easy. I don't sand, prime, or tape the edges. Just dip your regular old paint brush into the can and paint.
Step 4: Sand down the edges (if you want). Depending on how rustic of a look you are going for is the amount you should sand. I don't use any particular grit of sand paper I just grab whatever is in the deep recesses of my garage. I usually sand all the edges and maybe a few spots in the center of the drawer if I am going for a very rustic look. For this particular piece I did a very light sanding because I liked the clean look with the blue color I picked.
Step 5: After paint has dried (which takes maybe 2 hours if that) rinse off your paint brush and paint on 2 coats of polycrylic. Some people love the wax finish but there are all these steps about buffing and I have no idea what that means so I'll stick with this. Just paint it on... let it dry for a little bit.. and paint one more coat on.
Step 6: Reattach your knobs and then... you are DONE!
And nobody will believe you only payed $25 for this little beauty! And you can take the extra $150 dollars you would've spent on a brand new dresser and invest it! But that's another talk for another time. Have I mentioned I'm a 60 year old man trapped in a 25 year old girls body? I hope each of you can find the freedom in buying used. And the truth is... you will end up loving the pieces you put elbow grease into more then you love your brand new stuff. I can promise you that!


No comments:
Post a Comment